ADD A TRAVEL MAP TO YOUR PHOTO BOOK

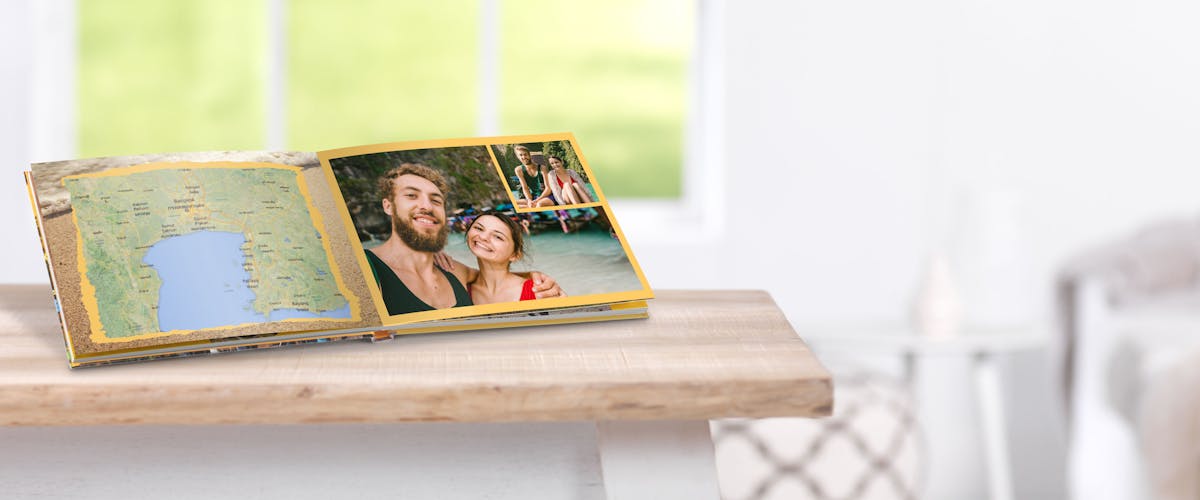
Insert the GPS location data of your photos into a map in your Pixum Photo Book to always keep an eye on your travel route.

Find out more
Save your travel map in a photo book

Insert the GPS location data of your photos into a map in your Pixum Photo Book to always keep an eye on your travel route.

Add a detailed travel map to your photo book

Travelling is an exciting experience and you often don't just stay in one place. It's quite the opposite: for many people, discovering many different places and taking in as many impressions as possible is the true fascination of travelling. Capture these magical moments with your camera or smartphone, so you can recall them later as you flip through your Pixum Photo Book.

You can visualize your own travel route in Pixum Photo Book with the help of Pixum Photo World software. Simply use the GPS data in a map to exactly recall the route afterwards. The location data can either be taken directly from the camera or entered manually into a file. That makes it easy to relate your numerous impressions and photographs to the specific location from the trip.

Our customers' choice

Format & size Cover & binding Paper type Price
Pixum Photo Book portrait large Hardcover, classic glue binding Premium paper matt Create online for ¤ 29,95 »
Pixum Photo Book landscape large Hardcover, classic glue binding Premium paper glossy Create online for ¤ 39,95 »

Adding a GPS travel map into a photo book is easy peasy

1. Adding a map to your travel photo book is simple and fast

With the Pixum Photo World software, you have a possibility to integrate one or several maps into your photo book.

This is how it works:

  1. Click on the map sign: you will find the button on the right side of the toolbar. There will then appear map options.
  2. Select the destination: select the corresponding map area by entering a post code, district (e.g., "Prague 1", "New York Chinatown") or the whole country. Enter the region or city name in the search box.
  3. Specify the map area: use + and - to zoom in our out of the map. You can also drag directly from the selected area. The scale ranges from about one kilometre to 20,000 kilometres, from a walk around the block of houses to a (near) world tour.
  4. Choose the display theme: in the next step, select the style in which the map is to be displayed.
    • Depending on the scope and character of the trip, you can choose between a political and a topographical map.
    • Political maps are best suited for city trips, while topographic maps show large scales and landscapes and are therefore a better choice for longer distances.
    • Click "apply" to run a preview of the map.
  5. Add a map: as soon as you are happy with the map area and the display style, click on "Apply" and the map will be inserted into your photo book.

Get creative now »

2. Mark special places on the map

If you wish to point out the highlights of your trip or visited places on the map, add flags or other symbols from the Cliparts (in the lower left corner of the software).

  • Select a clipart - e.g., from the "Map icons" category in the Travel section - and place it on the spot per drag and drop. To add more map icons to your cliparts, go to "more".
  • As with all cliparts, you can customise the markers according to your needs - e.g., add a text or change the colour per double click.

Save your trip route in a photo book

Feel inspired? Get creative right now!

For more information go on reading and learn everything about GPX tracking and how a camera with GPS function can do some work for you.

How much does a Pixum Photo Book cost?

Choose product details of your Pixum Photo Book for price calculating:

We're sorry. A problem arose during the product configuration. Please try again later.

    My selection

    from
    incl. VAT
    Create now
    * The listed prices refer to a Pixum Photo Book with 26 pages.

    Add a travel map to your photo book

    3. Add a GPS location map - via GPS tracking oder a GPX file

    A simple map is not enough and you would rather like to show your travel route through the country or the city? The Pixum Photo World software can read GPS coordinates of GPS trackers and display these on the map in your photo book. Use a so-called GPX file, which can either be created manually or taken from the GPS data of your camera.

    A) Using GPX file from cameras with GPS tracking:

    • Today, almost all digital and smartphone cameras support GPS tracking. To find out whether your device is geotagging photos, simply check the device settings.
    • If you are not sure, how to export the tracking as a GPX file have a look at the user manual or simply on the internet. You will quickly find detailed instructions for the very camera you are now using.
    • You might also want to use programs or Internet services such as Google Picasa Web Albums to match your photos with your location data.
    • If your camera is not natively GPS-enabled, a so-called "GPS data logger" might help. Such kind of a device can record routes and then conveniently compare these with the camera's recording times.

    B) Creating a route as a GPX file:

    • GPX - short for GPS Exchange Format - is a data format which helps store and exchange GPS data. The saved data contains certain routes and tracks.
    • With the help of free online tools - such as GPSies.com - you can create your own routes and export these as GPX files to your computer.

    C) How-To add a GPX file to the map to your photo book:

    1. Right-click on the map in the photo book and select "Select GPX Track" from the menu.
    2. Now click "Add" and select the GPX file from your computer that contains the coordinates (file_name.gpx).
    3. Change the colour and width of the line representing your route.
    4. Finally, confirm your selection by clicking on "OK" - your route will automatically appear on the map.

    Pixum tip

    How to turn the map into a background

    The Pixum Photo World software offers you not only the possibility to add a map but also display it in a subtle way by adding a transparency to it. You can then use the map as a background for travel snaps.
    Is a GPS camera a good investment for the next trip?

    Geotagging cameras are not only useful for creating a travel route but also to later find the exact place of that special moment: an abandoned house in the woods, a picturesque empty beach - places that could have not been located the usual way. Most smartphones also geotag your snaps to help you find it on the map again when you want to come back.

    Even if your camera does geotag the photos, make sure to invest some time to learn all the functions and options before you hit the road. There is nothing more frustrating as to find out, all the GSP data has been lost due to the incorrect use.

    3 most frequently asked questions to the GPS maps at a glance

    • How to add GPS data to your map?
      How to add GPS data to your map?

      The GPS data of your photos can be shown as a travel route on a map. Right click on the map to select "Select GPS track" and add the GPX files. After you confirm the selection, the map with your travel route appears on the photo book page.

    • Why adding a GPS location map to a photo book?
      Why adding a GPS location map to a photo book?

      A GPS travel route shows all your travel stops in the photo book. Even years after you still have a structured map of your favourite places on the route.

    • How much does it cost?
      How much does it cost?

      Per map an additional 0.99¤ will be charged on the regular Pixum Photo Book price - now, you can recall a precise travel route even years later and share your experience and recommendations with other travellers.

    Disover the great variety of the photo book formats

    Feedback | Pixum Photo Book


    Create your unique Photo Gifts at home or on the go

    • The photo book you have chosen is currently only available in the Pixum Photoworld Software. Please create this photo book on your PC/Mac or select one of our other formats.

      Online Editor

      • Design fast & easy:

        directly online

      • Make quick choices:

        flexible settings

      • We recommend it for:

        fast design with no extra installation