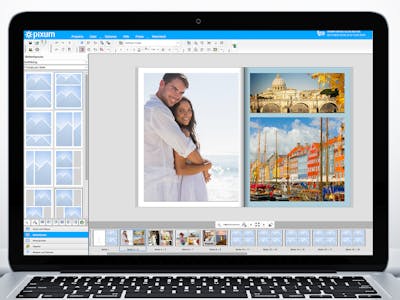
Get creative with the Pixum Photo Book and find great design ideas!
Rotating, moving or deleting photos in the Pixum Photo Book
When creating a Pixum Photo Book in the Pixum Photo World Software, your images are always placed in so-called layout frames. You can move them, reposition them and also move the images within the frames. This tip explains how to do this.
How to rotate, move, and delete individual photos in your photo book
To edit the desired layout frame, select it by clicking on it - or select several frames by dragging a selection rectangle over the page(s) while holding down the mouse button. As soon as you have selected one or more layout frames, they are marked with a colored border (= border frame). Now you can edit the frames as follows:
Rotate photos:
Inside the layout frame, there is a round dot at the top center. Simply drag it to the right or left while holding down the mouse button - your frame will then rotate in 1° steps. A 90° rotation is possible via the context menu (right mouse click) > "Rotate objects left/right".
Move/reposition photos:
To move photos, move your mouse pointer over the border frame until it becomes a cross with arrowheads. Now you can reposition the desired frame by holding down the left mouse button.
Delete photos:
To permanently delete an image from your Pixum Photo Book, simply press the Delete key or right-click > "Delete" with the frame selected. To remove the corresponding layout frame, for example to redesign the entire page or leave it blank, simply repeat the process a second time.
Saving time when creating a photo book
Do you want to save yourself the work of adding all your photos to the photo book? Use the Pixum Photo Book Assistant right at the beginning of the creation and define folders or images you want to present in your photo book. This way you will automatically receive a sorting suggestion, which you can of course adapt to your individual requirements.
Afterwards, you can conveniently edit and fine-tune the images in the photo show. " 2. How to design your Pixum Photo Book "
How to design your Pixum Photo Book
To design your personalised photo book, you can use various media - for example Pixum Photo World App for your smartphone or tablet and the flexible online designer or Pixum Photo World Software for PC and Mac.
Design your own photo book.Design your photo book in the Online Designer
- To layout your book in the Online Designer, simply click the "Start Online Designer" button on this page. In the window that now opens, you can choose from different format, material and cover variants and thus select your individually suitable format.
- By clicking on "Apply" you can start the design immediately. In the lower part of the page you select from the respective double sheets as well as the front and back covers of the photo book, while you can add or design various elements with the menu placed above.
- For example, different preconfigured layouts are available for each page: Choose between designs with one or more images in different arrangements.
- You can use the "Add" button to integrate additional image areas as well as texts and QR codes into your design.
- Drag and drop images from your hard disk or your "My Pixum" area from the left tab into the desired area.
Design a photo book in the photo world software
- Here you can find the photo books directly on the start screen or in the upper menu.
- Select a format and paper type first and decide whether you want to try out a preconfigured layout or do the design yourself.
- Don't worry: Even with the free design, there are still numerous layout templates available in the left menu bar, which you can simply drag and drop to the desired page.
- You can also customize the backgrounds of your book either for all pages at once or individually.
- If you want to add a personal touch to your photo book and, for example, add a little extra flair to large books, you can choose from numerous clip art as well as picture masks and frames.
If you have completed the design process and are satisfied with your design, simply click on "Add to Basket" and complete the order process.


